I have no idea why, but for the longest time I’ve avoided making yogurt at home, just something about it *really* intimidated me. Plus, regular yogurt is pretty affordable, so I just didn’t see the need to rush into try it out. Lately though, hubby and I have been eating the greek-style yogurt and LOVE it. It’s so thick and creamy (even the fat-free version), and you can add fruits, jams, flavored syrups, etc…without it getting “runny”.
Sadly, the cost of it is 2-3 times more expensive then normal yogurt, so I decided to buck-up and look for some homemade recipes and stumbled upon this one. It seemed simple enough, so I decided to try it out a couple nights ago. It turned out thick and creamy, simply FABULOUS and not overly tart! It’s not difficult to make at all, it just needs time to sit and develop, sort of like waiting for bread to rise, but longer.
I pretty much followed the recipe exactly and suggest starting this about 2 hours before you go to bed, as it needs to sit in the oven for 7-8 hours. Here are some photos and supplemental notes of my first attempt.
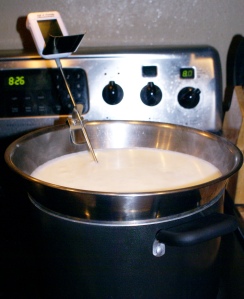
- I used the double-boiler method, as burnt milk is horrific! I took a large metal mixing bowl and placed it on top of a stock pot that had about 2 inches of water in it. I set the burner temp to med-high and clipped my candy thermometer to the side of the metal bowl. If you don’t have a candy/digital thermometer, a normal food-grade one will work too.
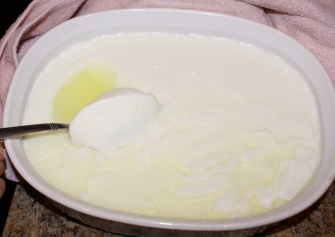
Once it reached the temp of 180 degrees, I poured it into a large Corningware casserole dish and let it cool down to 110 degrees, just as stated in the original recipe.
- I used 2 1/2 TBLS of plain yogurt + 2 TBLS cold milk as my starter. But before adding it to the 110 degree milk I did ladle in about a 1/2 cup of the hot milk into my starter mix. My thinking was, if the starter mix is more liquidy it would blend in easier with the rest of the hot milk.
I set my oven to 170 degrees, as that’s the lowest it will go. I used a small bath towel, folded in half (so a double layer), and tucked it tightly around the casserole dish once it was in the oven. After the yogurt had been in the oven for over an hour, hubby says to me “did you read all of the post comments? The last one was about 3 failed attempts due to the oven temperature not staying warm enough.” Uuumm…no?!? So I panicked and turned the oven on again to 170, but just for 1 minute! That probably wasn’t the smartest move, but the yogurt still turned out awesome!
After sitting in the oven overnight it has the consistency of normal plain yogurt. If this is what you want then the yogurt is done and you just need to drain some of the liquid. I however wanted the really thick and creamy yogurt, so onto the nest step – cooling & straining.
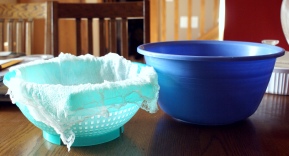
I used a large colander placed on top of a large/deep mixing bowl. After straining for an hour, 2 cups of liquid came out of the yogurt. I scraped the thicker yogurt off of the cheesecloth and mixed the yogurt up well, then strained for another 1.5 hours, where another 1.5 cups of liquid came out.
This made about 27oz. of greek-style yogurt, so about 5-6 servings and tastes just as good as the store bought version. As for the cost, 27oz. of store-bought is roughly $5, whereas making it at home will cost roughly $1.60 + 1 yard of cheesecloth (about $1.50/yard). If you get a nice quality cheesecloth you can rinse and re-use it again!


